Showing posts with label trick. Show all posts

Tuesday, February 6, 2018

Unifi controller docker image not working on Synology until...

I wanted to install a docker image into a running container using the fine work done by Jacob Alberty. And follow these steps. Unfortunately, I could not access the website on https://yournasip:8443. I was pulling my hairs out as I could see that the container was running, TCP IP4/6 ports were open, yet I could not access any website. I double checked that my firewall on the NAS was not blocking traffic, but that was not the case. I therefore reverted to starting the container from the command line. (Please note that I ommited the --init flag, as this flag (from 1.13 onwards) is not yet supported on the Docker version on my Synology (1.11.2).)

docker run --rm -p 3478:3478/udp -p 6789:6789/udp -p 8080:8080 \
-p 8443:8443 -p 8843:8843 -p 8880:8880 -p 10001:10001/udp -e TZ='Europe/Paris' \
-v /volume1/docker/unifi:/unifi --name unifi jacobalberty/unifi:stable

And tadaaa! Suddenly, I was able to access the Unifi Controller again. But when I stopped the command on the command line, the container would stop. So I needed a little trick.

  1. Start the docker container from the command line through an SSH session in the terminal.
  2. Verify that you can access the Unifi Controller
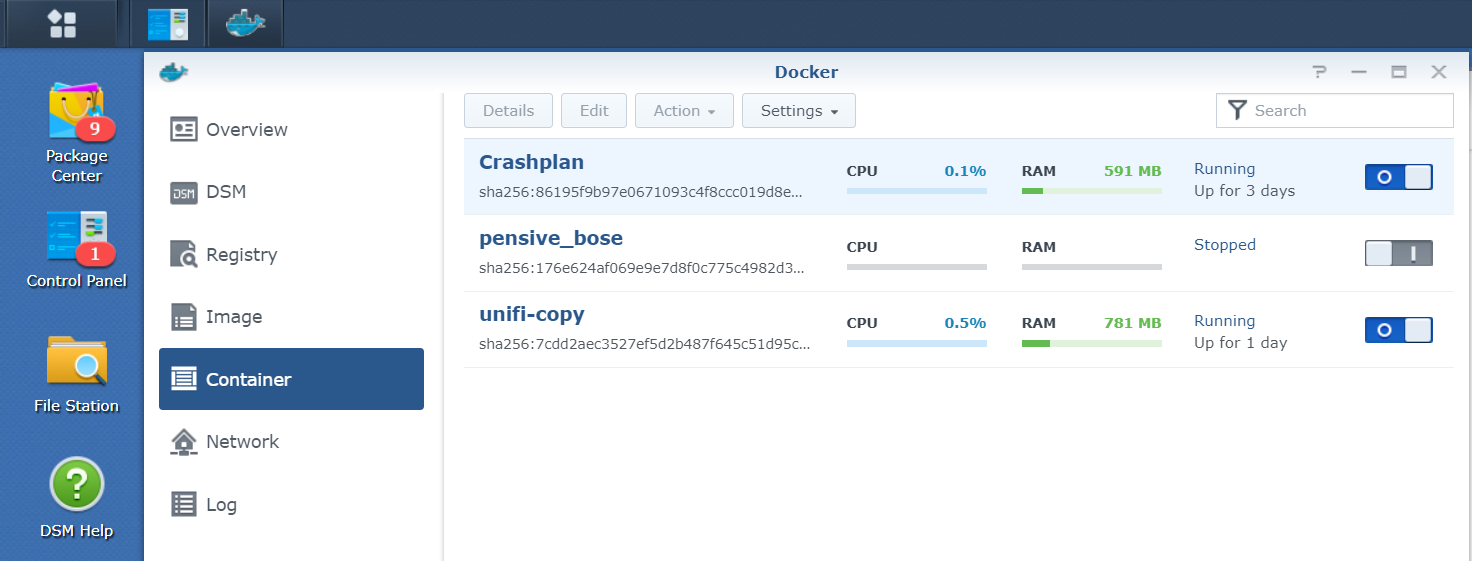
  3. Go to DSM and login, start the Docker app
  4. Click on 'Container' and identify the unifi container. Right-click it, go to Settings and then Duplicate Settings. A copy container will be made, named unifi-copy.
  5. Kill the docker command from the terminal. But now you have a second copy.
  6. Tweak and configure the copy container as you like and start it from the DSM.

Alternatively, you could also use the -d option as per documentation.
--detach , -dRun container in background and print container ID

Sunday, November 20, 2016

Enable HTTPS for EmonCMS on Raspbian

Our EmonCMS installation at home currently runs only over HTTP, which is not secure at all. Enabling HTTPS is a must do. However, there's a small tweak needed for it to work at the AllowOverride option.
Tip: If you run into the issue where you have HTTPS enabled, but the logging in returns always the login screen with message 'undefined', follow the fix explained below.

Check if HTTPS is already enabled for your Apache installation:

root@raspi1:~# netstat -an | grep LISTEN
tcp        0      0 0.0.0.0:80              0.0.0.0:*               LISTEN
tcp        0      0 0.0.0.0:22              0.0.0.0:*               LISTEN
As you can see, there is nothing running on port 443 (HTTPS) yet, so we'll need to enable the HTTPS configuration for Apache.

Enable the default HTTPS (SSL) configuration for Apache:

1. Check if the SSL module is already enabled for Apache.
root@raspi1:~# ls -l /etc/apache2/mods-enabled/*ssl*
root@raspi1:~#

If nothing is returned, the module is not enabled yet and needs to be linked from /etc/apache2/mods-available/

2. Make a symbolic link for the SSL module.
root@raspi1:~# cd /etc/apache2/mods-enabled/
root@raspi1:~# ln -s ../mods-available/ssl.conf ssl.conf
root@raspi1:~# ln -s ../mods-available/ssl.load ssl.load

3. Make a symbolic link for the SSL config file.
root@raspi1:~# cd /etc/apache2/sites-enabled/
root@raspi1:~# ln -s ../sites-available/default-ssl 000-default-ssl

4. Change two lines in the config file.
        DocumentRoot /var/www
        <Directory />
                Options FollowSymLinks
                #Changed None to All on 18/11/2016
                AllowOverride All
        </Directory>
        <Directory /var/www/>
                Options Indexes FollowSymLinks MultiViews
                #Changed None to All on 18/11/2016
                AllowOverride All
                Order allow,deny
                allow from all
        </Directory>

5. Restart your Apache now.
root@raspi1:~# /etc/init.d/apache2 restart

This tip came from here.